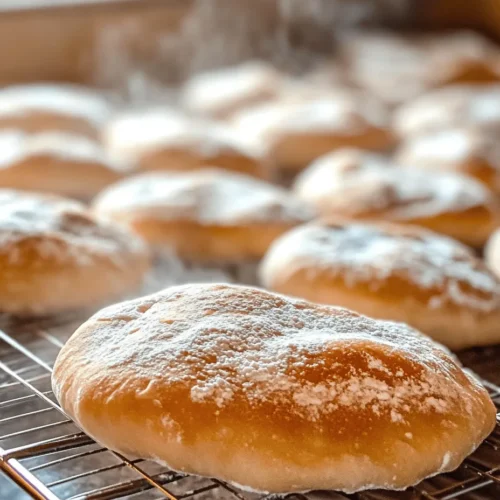
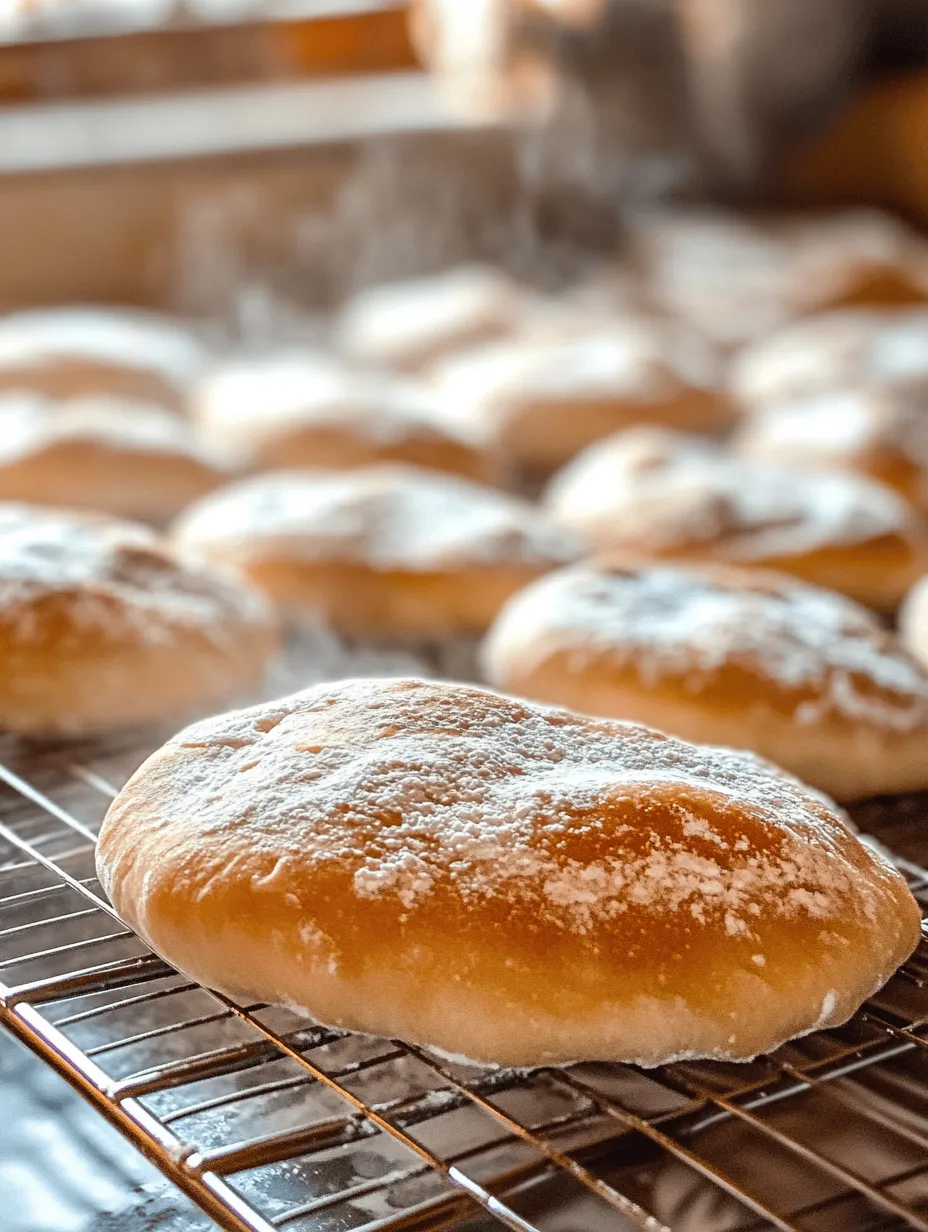
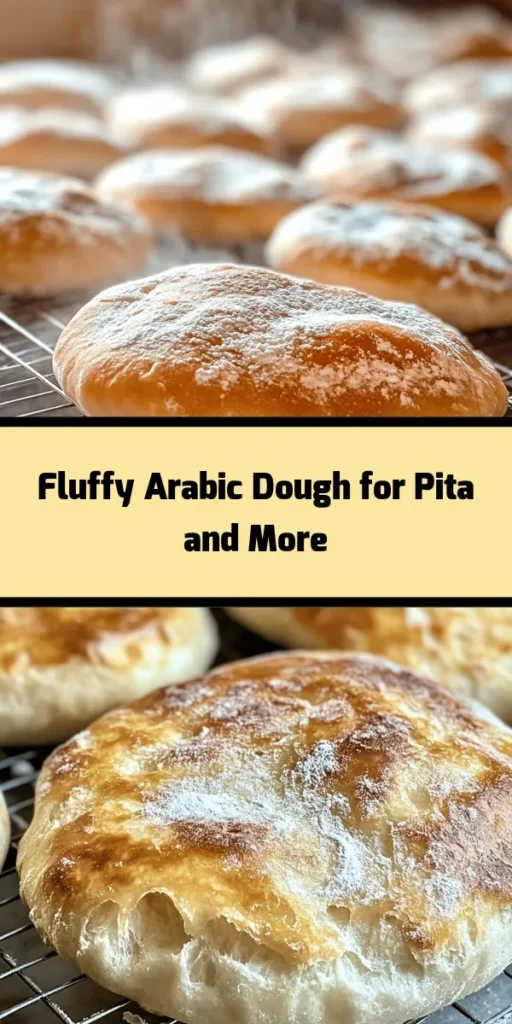
In the world of culinary delights, few things evoke a sense of tradition and comfort as much as homemade bread. The Arabic Dough Delight, often known for its versatility and rich flavors, stands as a testament to the art of bread-making in Middle Eastern cuisine. This recipe not only highlights the simple yet effective techniques behind creating perfect dough but also invites you to explore the various forms this dough can take—from fluffy pita bread to delightful pastries. The experience of crafting Arabic Dough Delight goes beyond merely following a recipe; it becomes a journey into the heart of a culture that has cherished the art of bread-making for centuries.
Bread in the Middle East is more than just a staple; it is a symbol of hospitality and community. In many households, the act of making bread is a cherished family tradition, often passed down through generations. The Arabic Dough Delight can be found in various settings, from bustling street markets to family gatherings, each with its unique twist that reflects regional tastes and preferences. This recipe embraces that spirit of tradition while allowing for creativity, enabling you to shape the dough into a variety of forms, each delicious in its own right.
Understanding the Ingredients: The Foundation of Flavor
To create the perfect Arabic Dough Delight, understanding the ingredients is crucial. Each component plays a specific role in ensuring the dough is flavorful, textured, and rises beautifully. Let’s take a closer look at the core ingredients that make up this delightful recipe.
All-Purpose Flour: Role and Benefits
All-purpose flour serves as the foundation of the dough, providing structure and texture. Its moderate protein content makes it ideal for various bread types, allowing for a chewy yet tender bite. When measuring flour, it’s essential to use the spoon-and-level method to avoid packing it too tightly, which can lead to a denser dough. The quality of the flour can significantly affect the outcome, so opt for high-quality brands that are known for their consistency.
The Importance of Warm Water in Yeast Activation
Warm water is crucial in activating the yeast, which is the leavening agent responsible for making the dough rise. The ideal temperature for water is between 100°F and 110°F (37°C to 43°C). If the water is too hot, it can kill the yeast, while water that is too cold will not activate it effectively. This step is vital, as the yeast will consume the sugars present in the dough, producing carbon dioxide and allowing the dough to rise and become airy.
Olive Oil: Enhancing Flavor and Texture
Olive oil is often added to the dough for its rich flavor and ability to enhance the texture. It contributes to a softer crumb and adds moisture, resulting in a delightful mouthfeel. Additionally, the fat in olive oil helps to prolong the freshness of the bread, making it enjoyable for days after baking. Choose a good-quality olive oil for the best flavor, as it can elevate the overall taste of your Arabic Dough Delight.
Sugar and Salt: Balancing Taste and Promoting Fermentation
Sugar is not only a flavor enhancer but also plays a crucial role in the fermentation process. It feeds the yeast, helping it to produce carbon dioxide, which causes the dough to rise. However, too much sugar can inhibit yeast activity, so it’s important to adhere to the recipe’s measurements.
Salt, on the other hand, is essential for flavor and also helps to control yeast fermentation. It strengthens the gluten structure in the dough, contributing to a better rise and texture. Balancing sugar and salt is key to achieving the perfect dough, ensuring that the flavors are harmonious without overpowering the natural taste of the bread.
Active Dry Yeast: The Leavening Agent Explained
Active dry yeast is a key ingredient in the Arabic Dough Delight, serving as the primary leavening agent. It is a dehydrated form of yeast that must be activated before use. This yeast helps the dough rise by producing carbon dioxide through fermentation. When properly activated, it results in a light and fluffy texture that is characteristic of well-made Arabic bread. For those who prefer a more traditional approach, fresh yeast can also be used, but it requires different handling and measurements.
The Step-by-Step Process: Crafting Your Dough Delight
Now that we’ve covered the essential ingredients, it’s time to dive into the step-by-step process of crafting your Arabic Dough Delight. Each stage is vital for developing the right texture and flavor, so let’s break it down.
Initial Yeast Activation
To start, you’ll need to activate your yeast. This is a critical first step that sets the foundation for your dough.
1. Dissolving Sugar in Water: Why Temperature Matters
Begin by measuring out warm water into a small bowl. Add a teaspoon of sugar to the water and stir until it dissolves. This sugar acts as food for the yeast. Sprinkle the active dry yeast over the top of the warm water-sugar mixture and let it sit for about 5-10 minutes. During this time, the yeast will start to foam and bubble, which is a positive indicator that it is alive and active.
2. Observing Yeast Froth: Indicators of a Healthy Yeast
After 5-10 minutes, you should see a frothy layer on top of the mixture. This froth is a sign that the yeast has been activated successfully. If you do not see any bubbling, it could mean the yeast is old or the water temperature was incorrect—discard the mixture and start again with fresh ingredients.
Combining Dry Ingredients
Once your yeast is activated, it’s time to prepare the dry ingredients.
1. The Science of Mixing Flour and Salt
In a large mixing bowl, combine the all-purpose flour and salt. It’s important to mix these two ingredients thoroughly before adding the yeast mixture to ensure an even distribution of salt. Salt can inhibit yeast activity if it comes into direct contact, so mixing it with the flour helps to prevent this.
2. Creating a Well: A Traditional Technique
Make a well in the center of the flour mixture. This traditional technique allows you to gradually incorporate the wet ingredients, ensuring a smoother dough. Pour the activated yeast mixture into the well, followed by olive oil, and prepare to bring your dough together.
Bringing the Dough Together
Now that your dry ingredients are ready, it’s time to combine everything into a cohesive dough.
1. Mixing Methods: Wooden Spoon vs. Hand Technique
Using a wooden spoon, start to mix the flour and yeast mixture together until it begins to form a rough dough. If you prefer a more hands-on approach, you can also use your hands to bring the mixture together. The goal is to combine the ingredients until there are no dry flour pockets left.
2. Understanding Dough Consistency: Signs of Proper Mix
The dough should be slightly sticky but not overly wet. If it feels too dry, you can add a small amount of water, a tablespoon at a time. Conversely, if it’s too sticky, sprinkle in a little more flour. The consistency is key—aim for a dough that holds together but is still pliable.
Kneading to Perfection
Kneading is an essential step in developing the gluten structure of the dough, which gives it strength and elasticity.
1. Techniques for Effective Kneading
Transfer the dough onto a lightly floured surface and begin kneading. Use the heels of your hands to push the dough away from you, then fold it back over itself. Rotate the dough a quarter turn and repeat. Kneading should take about 8-10 minutes, and you’ll notice the dough becoming smoother and more elastic as you work.
2. Recognizing Smooth and Elastic Dough
A well-kneaded dough should spring back when gently pressed with your finger. It should be smooth and soft to the touch, not sticky. If it feels tacky, continue kneading until you achieve the right texture.
The Rising Process: Patience is Key
Once kneading is complete, it’s time to let your dough rise—a process that requires patience but is vital for achieving the perfect Arabic Dough Delight.
1. Ideal Conditions for Dough Rising
Place the kneaded dough in a lightly oiled bowl, turning it to coat all sides with oil. Cover the bowl with a clean kitchen towel or plastic wrap to prevent the dough from drying out. Find a warm, draft-free spot in your kitchen for the dough to rise. An ideal temperature is around 75°F to 80°F (24°C to 27°C).
2. The Importance of Doubling in Size
Allow the dough to rise for about 1 to 1.5 hours, or until it has doubled in size. This process is crucial, as it allows the yeast to work effectively, creating the air pockets that give the bread its light texture.
3. Punching Down and Kneading Again
After the dough has risen, gently punch it down to release the air. This process is often referred to as “deflating” the dough. Turn it out onto a floured surface and knead it briefly—just enough to reshape it and redistribute the yeast. This second kneading helps to develop the flavor and texture further, setting you up for the next stages of shaping and baking your Arabic Dough Delight.
With these initial steps completed, you are well on your way to creating a delicious and versatile Arabic Dough Delight. Stay tuned for the next part of this article, where we’ll explore the various ways to shape and bake this delightful dough, bringing you even closer to enjoying the rich flavors of Middle Eastern bread.
Releasing Air: Why It’s Necessary
After the initial fermentation period, it’s important to release the air that has built up in the dough. This process, known as “degassing,” is crucial for achieving the right texture in your Arabic Dough Delight. By gently kneading the dough again, you redistribute the yeast and gluten, ensuring that your final product has a light, airy structure. This step prevents large air pockets from forming during baking, which can lead to uneven textures and a less-than-ideal final product.
To degas your dough, simply press your fingers into the surface to push out the air while folding the dough over itself. This should take just a few minutes and will greatly enhance the quality of your bread.
Preparing for Shaping: Final Touches on the Dough
Once you’ve released the air, it’s time to prepare your dough for shaping. This involves dividing the dough into equal portions, typically about 100-150 grams each, depending on the size of the bread you desire. Use a bench scraper to cut the dough, keeping your work surface lightly floured to prevent sticking.
After cutting, gently shape each portion into a ball by tucking the edges inward and rolling it against the surface of your worktop. This creates tension on the surface of the dough, which is essential for achieving a nice rise when baking. Cover the dough balls with a damp cloth and let them rest for about 15-20 minutes. This resting period allows the gluten to relax, making it easier to shape the dough into your desired forms.
Shaping Options: Versatility of Arabic Dough
Arabic Dough is incredibly versatile, allowing for a variety of bread forms that cater to different occasions and tastes. Here are some popular shaping options to consider:
Pita Bread: The Classic Choice
Pita bread is one of the most beloved uses of Arabic Dough. To shape pita, flatten each dough ball into a disc about ¼ inch thick. Use a rolling pin to ensure even thickness, which is essential for achieving the classic puff during cooking. Be sure to keep the edges slightly thicker than the center to encourage a good pocket.
Flatbreads: Simple and Delicious
Flatbreads can be made using the same dough, providing a chewy and flavorful option. For flatbreads, roll each dough ball into a larger disc, about ½ inch thick. You can leave them plain or sprinkle with herbs, spices, or sesame seeds for added flavor. These breads can be served as a side to stews, dips, or salads.
Pastries: Sweet and Savory Variations
If you’re feeling adventurous, you can use Arabic Dough to create pastries. Fill your dough with a variety of fillings, such as spiced meats, cheeses, or sweet mixtures like nuts and sugars for a delightful treat. Fold the dough over the filling, pinch the edges to seal, and bake until golden brown. These pastries can be served as appetizers or desserts, showcasing the dough’s versatility.
Cooking Techniques: From Dough to Delicious
Cooking Pita Bread on a Skillet
Cooking pita bread on a skillet is a traditional method that yields excellent results. Preheat a cast-iron skillet or a heavy-bottomed pan over medium-high heat. You want the skillet to be hot to ensure that the pita puffs up properly.
Temperature Control: Achieving the Perfect Puff
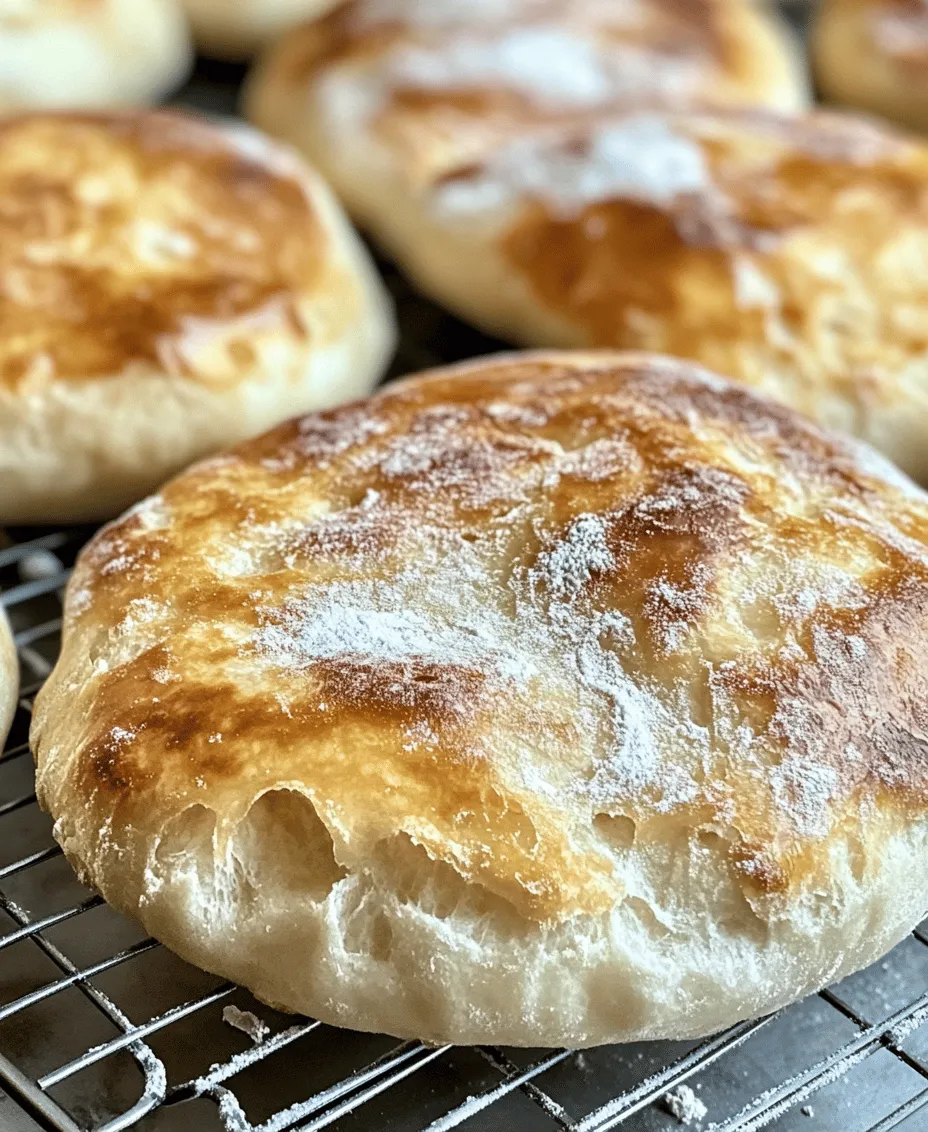
When you place the rolled-out dough onto the hot skillet, the high temperature causes the moisture in the dough to steam, creating the iconic pocket in pita bread. If your bread isn’t puffing up, it may be a sign that your skillet isn’t hot enough. Make sure to adjust the heat as needed to maintain a consistent cooking temperature.
Cooking Time: Ensuring Even Browning
Cook each pita for about 1-2 minutes on one side, then flip it over and cook for an additional 1-2 minutes. You should see the bread puffing up and turning a lovely golden brown. Keep an eye on the color to prevent burning. Once done, stack your cooked pita on a plate and cover it with a clean kitchen towel to keep it warm and soft.
Using Dough for Other Recipes
Baking Flatbreads: An Alternative Method
If you prefer baking to stovetop cooking, you can also bake your flatbreads in the oven. Preheat your oven to 475°F (245°C) and place a baking stone or a baking tray inside to heat up. Roll out your flatbreads and carefully place them onto the hot stone or tray. Bake for around 5-7 minutes, or until they puff up and turn lightly browned. This method gives you a slightly different texture and flavor, perfect for pairing with dips or stews.
Incorporating Leftover Dough into Meals
Don’t let any leftover dough go to waste! You can easily incorporate it into other meals. Use scraps of dough to make small rolls or breadsticks, perfect for serving alongside soups or salads. Alternatively, you can freeze unused dough for up to a month. Just ensure it’s well wrapped in plastic wrap and stored in an airtight container. When you’re ready to use it, simply thaw it in the refrigerator overnight before shaping and cooking.
Cultural Significance: The Role of Bread in Arabic Cuisine
Historical Context of Bread in the Middle East
Bread holds a significant place in Arabic culture, dating back thousands of years. In the Middle East, bread is not merely a food item; it is a symbol of sustenance and community. Throughout history, it has been a vital part of daily life, and its preparation has evolved over generations. Different regions have their own unique styles and methods, but the core idea remains the same: bread is a staple that brings people together.
Bread as a Staple Food: Its Importance in Daily Life
In many Arab households, bread is considered an essential food that accompanies nearly every meal. From breakfast to dinner, it serves as a vehicle for flavors, helping to soak up delicious stews, dips, and sauces. This integral role in the diet highlights the importance of bread in nurturing family bonds and cultural identity.
The Symbolism of Bread in Arabic Culture
Bread also carries deep symbolism in Arabic culture. It is often associated with hospitality and generosity. Offering bread to guests is a sign of respect and a gesture of welcome, reflecting the warm traditions of sharing and community. The act of breaking bread together fosters connections and strengthens relationships, making it a central element during gatherings and celebrations.
Celebratory Events and Bread
Traditional Occasions for Baking
Baking bread is often reserved for special occasions, such as weddings, religious holidays, and family gatherings. During Ramadan, for instance, the preparation of bread takes on a communal aspect, with families coming together to bake and share. The aroma of freshly baked bread wafting through homes symbolizes togetherness and joy during these festive times.
Bread as a Symbol of Hospitality
In many cultures, bread is synonymous with hospitality. In Arabic tradition, offering bread to guests is customary, signifying warmth and generosity. When people gather, bread is usually the first item presented, establishing a sense of welcome and community. It is common to see people breaking bread together, reinforcing social bonds in both casual and formal settings.
Nutritional Value: Understanding the Health Aspects
Analyzing the Ingredients
The ingredients used in Arabic Dough are not only simple but also wholesome. Flour, water, salt, and yeast come together to create a nutritious base for various types of bread. Whole grain flour can be used to increase the fiber content, enhancing the health benefits of your bread.
Nutritional Benefits of Whole Ingredients
When made with whole ingredients, Arabic bread can provide essential nutrients, including carbohydrates for energy, fiber for digestive health, and proteins for muscle repair. Incorporating healthy fats, such as olive oil, can further enhance the nutritional profile, making your bread not only delicious but beneficial for overall health.
Bread as Part of a Balanced Diet
In moderation, bread can be part of a balanced diet, especially when made from whole grains. Pairing bread with vegetables, lean proteins, and healthy fats can create a wholesome meal that satisfies hunger while providing essential nutrients. Embracing bread as part of a varied diet allows you to enjoy its flavors while still nourishing your body.
Conclusion: Embracing the Art of Bread-Making
The journey of creating Arabic Dough Delight is not just about following a recipe; it is an experience steeped in history, culture, and community. This delightful bread brings people together, whether it’s around a dinner table or during special occasions. By understanding the ingredients, mastering the techniques, and appreciating the cultural context, you not only become a skilled baker but also a custodian of a rich culinary heritage. Embrace the art of bread-making in your kitchen and savor the joy that comes with every bite of your homemade Arabic Dough Delight. As you knead, shape, and bake, you’re not just crafting bread; you’re participating in a timeless tradition that honors the past and nourishes the present.