Introduction
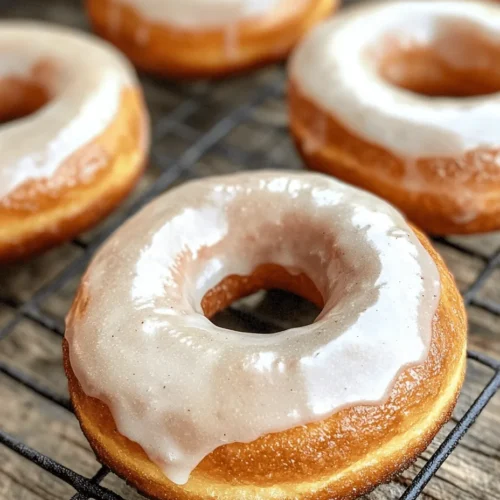
There’s something undeniably delightful about the aroma of freshly baked donuts wafting through the kitchen. The appeal of homemade donuts goes beyond just taste; it’s about the memories created, the love infused in each bite, and the excitement that comes from crafting something so delicious with your own hands. While store-bought donuts can satisfy a sweet tooth, nothing compares to the satisfaction of enjoying a warm, homemade donut that is “melt in your mouth” tender.
What does “melt in your mouth” really mean? It refers to that exquisite texture that allows a donut to dissolve on your tongue, leaving behind a rich flavor that lingers pleasantly. This recipe promises just that, with a perfect balance of lightness and indulgence. Achieving this delightful texture involves using fresh ingredients and simple techniques that anyone can master. Whether you’re an experienced baker or a novice in the kitchen, this recipe will guide you step by step to create the perfect glazed donuts that will soon become a family favorite.
The Joy of Homemade Donuts
Making donuts at home is a rewarding experience that brings a unique joy to both the baker and those who get to enjoy the finished product. One of the most significant benefits of crafting your own donuts is the ability to customize flavors and toppings to suit your preferences and those of your family or guests. You can experiment with different glazes, fillings, and spices, ensuring that every batch is unique and tailored to your taste.
The satisfaction of creating your desserts cannot be understated. There’s a certain pride that comes with serving a treat that you’ve made from scratch. Homemade donuts can elevate family gatherings, birthday parties, or weekend brunches, transforming a simple meal into a special occasion. Imagine the smiles on your loved ones’ faces as they bite into a warm, glazed donut that you made yourself. Plus, spending time in the kitchen together can be a fun bonding experience, especially for families with children. It’s a wonderful way to teach them about baking and the joy of creating something delicious.
Ingredient Breakdown
Before diving into the step-by-step instructions, it’s essential to understand the key ingredients that make these donuts so special. Each component plays a crucial role in achieving the desired texture, flavor, and overall success of the recipe.
All-Purpose Flour
The foundation of any great donut is all-purpose flour. This versatile ingredient provides the structure necessary to hold the donut together while still allowing it to remain light and airy. When measuring flour, be sure to spoon it into your measuring cup and level it off for accuracy; too much flour can lead to dense donuts.
Granulated Sugar
Sugar not only sweetens the donuts but also contributes to their structure. Granulated sugar helps create a tender crumb and enhances the overall flavor profile. The right amount of sugar balances sweetness with the other flavors, ensuring that each bite is satisfying without being overwhelmingly sweet.
Baking Powder and Baking Soda
These leavening agents are essential for achieving that light, fluffy texture that characterizes a perfect donut. Baking powder provides a reliable lift, while baking soda works in tandem to create the right chemical reactions that result in a beautifully risen donut. Together, they ensure that each donut is airy and melt-in-your-mouth delicious.
Ground Nutmeg
Nutmeg adds a warm, aromatic flavor that elevates the overall taste of the donuts. This spice is often associated with comfort and nostalgia, making it a perfect addition to sweet treats. A little goes a long way, so be sure to use it sparingly to enhance the flavor without overpowering it.
Buttermilk
Buttermilk is an essential ingredient in this recipe, adding moisture and a subtle tanginess that balances the sweetness. The acidity in buttermilk interacts with the baking soda, helping to create a tender crumb while also enriching the flavor. If you don’t have buttermilk on hand, you can easily make a substitute by mixing milk with a little lemon juice or vinegar.
Unsalted Butter
Butter brings richness and flavor to the donuts. Using unsalted butter allows you to control the salt content in your recipe, ensuring that the sweetness and flavors shine through. For the best results, be sure to use butter that is at room temperature, as this will blend more easily with the other ingredients.
Egg
Eggs provide binding and moisture, playing a crucial role in the donut’s structure. They help incorporate air into the batter, contributing to the lightness of the finished product. For this recipe, large eggs are recommended to ensure the right balance of ingredients.
Vanilla Extract
Vanilla extract is often referred to as the “secret ingredient” in many baking recipes, and for good reason. It adds depth and complexity to the flavor, making your donuts irresistible. Opt for pure vanilla extract for the best taste; the synthetic versions can lack the richness that real vanilla offers.
Powdered Sugar and Milk for the Glaze
No donut is complete without a delicious glaze! A simple mixture of powdered sugar and milk creates a smooth, glossy finish that adds sweetness and visual appeal. The glaze enhances the overall experience, making each donut not just a treat for the taste buds but also a feast for the eyes.
Step-by-Step Instructions
Now that we’ve covered the essential ingredients, let’s move on to the exciting part: preparing the donuts! Follow these detailed instructions to ensure your glazed donuts turn out perfectly every time.
Prepping the Oven and Donut Pan
1. Preheat Your Oven: Start by preheating your oven to 375°F (190°C). This ensures that your donuts will bake evenly and develop a lovely golden color.
2. Prepare the Donut Pan: Grease your donut pan generously with non-stick cooking spray or butter. This step is crucial for preventing the donuts from sticking, allowing you to easily remove them once they are baked. If you have a silicone donut pan, you may not need to grease it as much, but a light coating will still help.
3. Gather Your Ingredients: Before you begin mixing, gather all your ingredients and tools. This includes measuring cups, mixing bowls, a whisk, a spatula, and your donut pan. Having everything ready will make the process smoother and more enjoyable.
By following these initial steps, you are setting the stage for a successful donut-making experience. In the next section, we will dive into the mixing and baking process, ensuring you achieve those perfect melt-in-your-mouth glazed donuts that everyone will love. Stay tuned for the continuation of this delicious journey into the world of homemade treats!
Mixing Dry Ingredients
To begin crafting your melt-in-your-mouth glazed donuts, the first step is to properly mix your dry ingredients. This includes the all-purpose flour, baking powder, baking soda, and salt. When measuring out the flour, it’s essential to use the spoon-and-level method. This involves scooping the flour into your measuring cup with a spoon and then leveling off the top with a straight edge. This technique helps prevent your donuts from being dense and dry.
Sifting the dry ingredients is another critical step. While it may seem optional, sifting helps aerate the flour and evenly distributes the baking powder and soda, which leads to a more uniform rise during baking. If you don’t have a sifter, a fine-mesh sieve works just as well. Whisk the dry ingredients together in a large bowl until they are well combined, ensuring there are no lumps. This creates a perfect base for your donut batter.
Whisking Wet Ingredients
Next, we’ll whisk together the wet ingredients. This typically includes eggs, milk (or a non-dairy alternative), melted butter (or coconut oil), and vanilla extract. The key to achieving the right consistency is to whisk the eggs first before adding the other ingredients. This incorporation of air helps create a fluffier donut. Once the eggs are well-beaten, add the melted butter and mix until combined. For a smoother batter, ensure that the melted butter has cooled slightly before adding it to avoid cooking the eggs.
Afterward, slowly pour in the milk and vanilla extract, whisking continuously until the mixture is smooth and homogenous. The batter should be slightly thick but pourable. If it appears too thick, you can add a little more milk, a tablespoon at a time, until you reach the desired consistency.
Combining Mixtures
Once your wet and dry ingredients are prepared, it’s time to combine them. Pour the wet mixture into the bowl containing the dry ingredients, and gently stir with a spatula or wooden spoon. It’s crucial to mix just until there are no dry pockets visible. Overmixing can develop gluten in the flour, leading to tougher donuts. Aim for a batter that is slightly lumpy; this is perfectly acceptable and will yield light, fluffy donuts.
Filling the Donut Pan
To fill your donut pan, you can use a piping bag for convenience, but if you don’t have one, don’t worry! You can create your own piping bag using a ziplock bag. Simply fill the bag with the batter, seal it tightly, and cut off one of the corners. This will allow you to pipe the batter directly into each donut cavity. Fill each cavity about two-thirds full to ensure the donuts have room to rise without overflowing.
Baking Process
With your donut pan filled, it’s time to bake! Preheat your oven to 350°F (175°C) and place the pan in the center of the oven. Bake for 10-12 minutes, or until the donuts are golden brown and spring back when lightly pressed. A toothpick inserted into the center should come out clean, indicating they are fully baked.
Once out of the oven, allow the donuts to cool in the pan for about 5 minutes before transferring them to a wire rack. Cooling them on a rack helps prevent them from becoming soggy as they release steam. Allow them to cool completely before glazing, as a warm donut can cause the glaze to melt and become runny.
Making the Perfect Glaze
The glaze is where the magic happens, transforming your simple donuts into a delightful treat. It enhances not only the flavor but also the visual appeal of your donuts. A basic glaze consists of powdered sugar, milk, and vanilla extract. The sweetness of the powdered sugar balances the richness of the donut, creating a perfect harmony of flavors.
Step-by-Step on Creating the Glaze
1. In a medium bowl, sift 1 cup of powdered sugar to remove lumps.
2. Slowly add 2-3 tablespoons of milk, whisking until smooth.
3. Stir in 1 teaspoon of vanilla extract for that extra flavor boost.
4. If the glaze appears too thick, add an additional tablespoon of milk until you reach your desired consistency.
Achieving the Right Consistency and Texture
For the perfect glaze, you want it to be thick enough to coat the back of a spoon without dripping off too quickly. If you prefer a thinner glaze, simply add more milk. Conversely, for a thicker glaze, add more powdered sugar. Remember, the goal is to create a luscious coating that enhances the donut without overpowering it.
Tips for Flavor Variations
Feel free to experiment with your glaze! Adding spices such as cinnamon or nutmeg can elevate the flavor profile. A touch of citrus zest—like lemon or orange—can bring a refreshing twist as well. For those feeling adventurous, consider adding a splash of flavored extracts like almond or maple to personalize your glaze even further.
Glazing Techniques
Once your donuts are cool and your glaze is ready, it’s time to apply it. There are several techniques you can use:
– Dipping Method: Simply dip the top half of each donut into the glaze, allowing any excess to drip back into the bowl.
– Drizzling Method: Use a spoon to drizzle glaze over the tops of the donuts for a more artistic touch.
– Coating Method: For a thicker layer of glaze, fully submerge the donut in the glaze, then place it on a wire rack to allow the excess to drip off.
Allow the glaze to set for at least 10 minutes before serving. This step is crucial for presentation, ensuring that the glaze doesn’t run off the donuts and creates a beautiful finish.
Suggestions for Additional Toppings
Once glazed, consider adding toppings for extra texture and flavor. Sprinkles, crushed nuts, or shredded coconut can add a delightful crunch and visual appeal. For a festive touch, consider drizzling melted chocolate or caramel over the glazed donuts.
Serving Suggestions
Melt-in-your-mouth glazed donuts can be enjoyed any time of day! Here are a few ideas for pairing your donuts with beverages:
– Coffee: The rich flavors of coffee complement the sweetness of the donuts perfectly.
– Tea: A light herbal or chai tea can provide a lovely contrast to the sweetness.
– Milk: Classic and comforting, milk is a timeless pairing with sweets.
For special occasions, consider presenting your donuts on a decorative platter, alongside a selection of beverages for a delightful brunch spread. You can even create a donut bar with various glazes and toppings, allowing guests to customize their treats.
Storage Tips
To maintain freshness and flavor, store your glazed donuts in an airtight container at room temperature for up to 2 days. If you need to keep them longer, consider freezing them. Place the cooled donuts in a single layer on a baking sheet and freeze until solid. Then, transfer them to a ziplock bag or an airtight container, where they can last for up to a month. When you’re ready to enjoy them, simply thaw at room temperature or warm them in the oven for a few minutes.
Nutritional Information
Understanding the nutritional aspect of your homemade treats can help you enjoy them as part of a balanced lifestyle. Each donut has approximately:
– Calories: 180
– Total Fat: 7g
– Saturated Fat: 4g
– Carbohydrates: 25g
– Sugar: 10g
– Protein: 2g
While these donuts are a delightful indulgence, enjoying them in moderation is key. They can be a part of a balanced diet when paired with healthier foods throughout the day.
Conclusion
Making melt-in-your-mouth glazed donuts is not only a culinary adventure but also a delightful experience that brings joy to your kitchen. The process of mixing, baking, and glazing allows for creativity and personalization, inviting you to experiment with flavors and toppings that suit your palate.
As you savor the fresh, homemade taste of your donuts, take a moment to appreciate the joy that baking can bring—whether it’s for a special occasion or just a treat for yourself. Don’t hesitate to try different flavors and toppings, and share these delightful creations with friends and family. Homemade treats have a unique way of brightening everyday moments and creating lasting memories. So, roll up your sleeves, gather your ingredients, and get ready to indulge in the sweet satisfaction of your homemade glazed donuts!