Introduction
The aroma of freshly baked bread wafting through the kitchen is a sensory experience that captivates many. Homemade bread not only fills your home with warmth but also offers a delicious way to enjoy a staple that has been cherished for centuries. Whether it’s for a cozy dinner, a simple breakfast, or a delightful snack, bread holds a special place in our culinary hearts. However, not everyone has the luxury of an oven, or perhaps, the time to spare waiting for it to preheat.
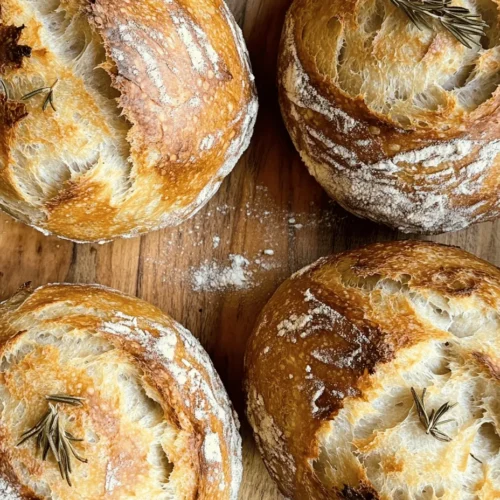
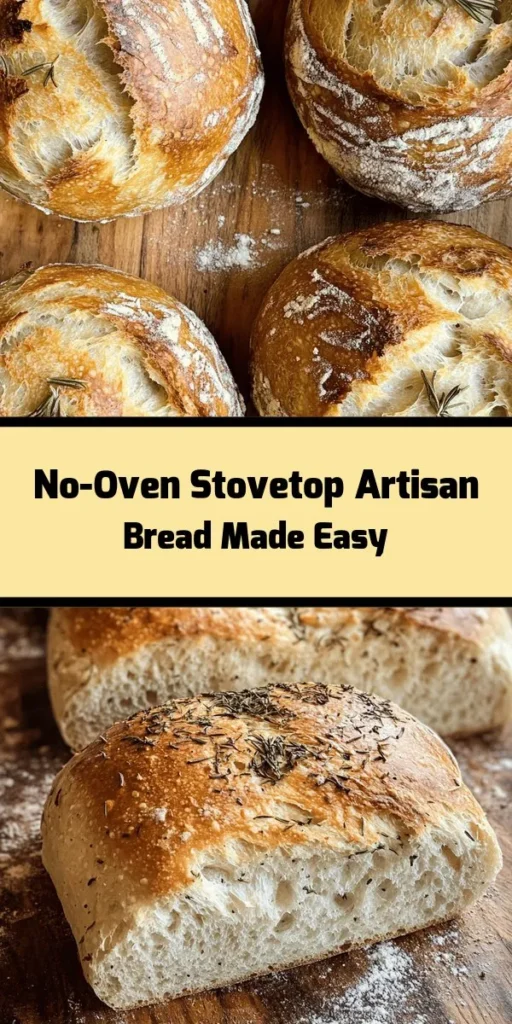
Enter the stovetop artisan no-oven bread—a revolutionary way to create mouthwatering, crusty bread without the need for an oven. This method has gained popularity among home bakers looking for a simpler, quicker alternative that still delivers on flavor and texture. The stovetop technique allows for easy bread-making while staying accessible to anyone, regardless of their kitchen setup.
The benefits of crafting artisan-style bread at home are numerous. Firstly, you have complete control over the ingredients, allowing you to customize flavors to your liking. Homemade bread is also fresher than store-bought varieties, which often contain preservatives and artificial additives. With this stovetop method, you can enjoy the satisfaction of creating a loaf that is not only delicious but also bursting with flavor and texture. Say goodbye to dull, store-bought bread, and embrace the joy of baking your own artisan bread right on your stovetop.
Understanding Your Ingredients
To create a successful stovetop artisan bread, it’s vital to understand the role of each ingredient in the recipe. This knowledge not only ensures a delicious end product but also enhances your overall baking experience.
All-Purpose Flour
All-purpose flour is the cornerstone of this recipe, and it’s the best choice for a variety of baked goods, including bread. This flour type strikes the perfect balance between protein and starch, providing the necessary structure and chewiness that we associate with artisan bread. The protein content in all-purpose flour typically ranges from 10-12%, which is sufficient for gluten development, giving your bread the delightful texture that makes it so appealing.
Baking Powder
Baking powder serves as the leavening agent in this bread recipe, simplifying the baking process. Unlike yeast-based breads that require rising time, baking powder allows for quick preparation. When mixed with liquid and exposed to heat, baking powder releases carbon dioxide, which helps the bread rise and become fluffy. This makes it an excellent option for those who want homemade bread without the lengthy process of proofing and kneading.
Salt
Salt is a crucial ingredient in bread making, not just for flavor enhancement but also for dough development. It strengthens gluten, which contributes to the structure and texture of the bread. Additionally, salt balances the flavors, ensuring that the bread isn’t bland. A well-salted loaf elevates the overall taste and makes each bite memorable.
Sugar
Sugar plays multiple roles in bread-making. It not only adds sweetness but also aids in browning, giving your bread a beautiful, golden crust. During the baking process, sugar caramelizes, which enhances flavor and contributes to the crust’s crispiness. In this recipe, only a small amount of sugar is needed, but its impact on the final product is significant.
Warm Water
Water is the vital element that brings all the dry ingredients together, forming a cohesive dough. The temperature of the water is essential for activating the baking powder effectively. Ideally, warm water (around 100°F to 110°F) is used, as it helps to dissolve the dry ingredients and promotes a better rise. Too hot, and it could kill the leavening agent; too cold, and the dough may not rise adequately.
Olive Oil
While optional, olive oil can significantly enhance the flavor and texture of your bread. It adds richness and moisture, making for a softer crumb. Olive oil also contributes to the overall mouthfeel of the bread, creating a delightful contrast between the crusty exterior and the tender interior. If you prefer, you can substitute it with other types of oil or even melted butter, depending on your taste preferences.
Dried Herbs
Incorporating dried herbs into your bread can add exciting flavor variations. They can elevate a simple loaf into something extraordinary. Popular choices include rosemary, thyme, or oregano, each offering its unique taste and aroma. Using high-quality dried herbs can ensure that their flavors are robust and aromatic, enhancing the overall experience of your homemade bread.
Tips on Selecting High-Quality Ingredients
To achieve the best results, it’s essential to select high-quality ingredients. When choosing flour, opt for brands that are known for their quality and freshness. A good flour will have a consistent texture and will not be overly clumpy. For baking powder, check the expiration date to ensure it’s still active, as old baking powder can lead to flat bread. When it comes to salt, kosher salt or sea salt is recommended for its clean flavor.
In terms of olive oil, choosing extra virgin olive oil can impart a rich flavor that complements the bread beautifully. For herbs, look for those that are vibrant in color and aromatic. If possible, buy from a local source or consider growing your own herbs to ensure maximum freshness.
The Stovetop Cooking Method
The stovetop method for baking bread is a game-changer for many home bakers. This technique offers several advantages over traditional oven baking, making it a perfect alternative for those who may not have access to an oven or who want to save on energy costs.
Energy Efficiency
One of the most significant benefits of using the stovetop is energy efficiency. Ovens typically require preheating, which can consume a lot of energy. In contrast, using a stovetop requires less energy and time, allowing you to bake bread quickly, which is especially appealing on hot days when you want to avoid heating up the entire kitchen.
Accessibility for Those Without an Oven
Not everyone has access to a full kitchen equipped with an oven. The stovetop method opens up the world of bread-making to those who may be living in small apartments, dormitories, or other spaces with limited cooking facilities. This accessibility means that anyone can enjoy the satisfaction of baking their own bread, regardless of their living situation.
Flavor Infusion from the Skillet
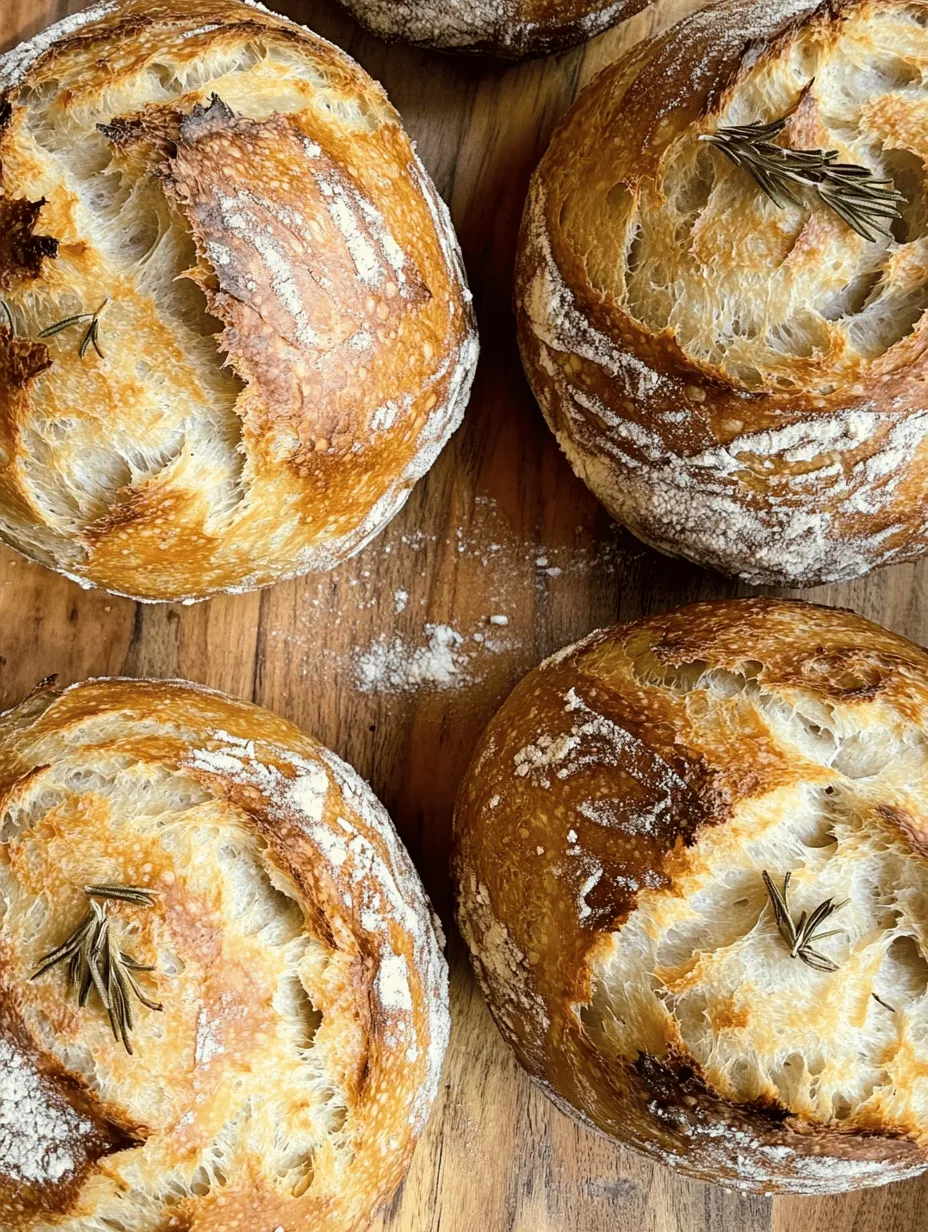
Baking bread on the stovetop allows for a unique flavor infusion that traditional baking methods may not achieve. When bread is cooked in a skillet, it comes into direct contact with the heat source, resulting in a beautifully crusty exterior while keeping the inside soft and fluffy. The enclosed space of a covered skillet also helps trap steam, which contributes to the overall texture and flavor development of the bread.
Comparison with Traditional Baking Methods
While traditional baking methods have their merits, the stovetop approach offers a refreshing alternative. The time-saving aspect of stovetop bread-making allows for spontaneity—you can whip up a loaf on a whim without the need for extensive preparation. Additionally, the stovetop method requires minimal equipment, making it approachable and straightforward for novice bakers.
Step-by-Step Instructions
Now that we have covered the essential ingredients and the benefits of using the stovetop method, it’s time to dive into the step-by-step instructions for making your stovetop artisan no-oven bread.
Mixing Dry Ingredients
The first step in our recipe is to gather and mix the dry ingredients. Start by measuring out all-purpose flour, baking powder, salt, and sugar. It’s crucial to blend these ingredients thoroughly to ensure an even distribution of the baking powder and salt throughout the flour. This step is vital for achieving a consistent rise and flavor in your bread.
1. In a large mixing bowl, add 3 cups of all-purpose flour. Use a whisk to aerate the flour and break up any clumps.
2. Next, measure 1 tablespoon of baking powder and sprinkle it evenly over the flour. This will be the primary leavening agent for your bread.
3. Add 1 teaspoon of salt to the mixture, ensuring it is well-distributed to enhance the flavor of the bread. Remember, salt is essential for both enhancing taste and improving dough structure.
4. Finally, include 1 tablespoon of sugar to add a touch of sweetness and aid in browning. Whisk these dry ingredients together until they are fully combined.
This initial mixing of dry ingredients is a crucial step that lays the foundation for your stovetop artisan bread, setting you up for success in the baking process.
As we continue through the recipe, we will explore how to incorporate the wet ingredients, form the dough, and finally cook the bread on the stovetop. Stay tuned for the next part of this recipe, where we will delve deeper into creating the perfect artisan loaf!
Adding Wet Ingredients: Techniques for Achieving the Perfect Dough Consistency
To create the perfect dough for your stovetop artisan bread, the way you add wet ingredients significantly impacts the outcome. Start by combining your dry ingredients in a mixing bowl, ensuring they are well mixed. This typically includes flour, salt, and any other dry flavors you wish to incorporate.
Next, create a well in the center of the dry mixture to pour in your wet ingredients, which can include warm water, olive oil, or even yogurt for added moisture. The temperature of your water is crucial; it should be warm but not hot, as boiling water can kill the yeast if you’re using it.
Begin by adding about three-quarters of your liquid, mixing gently with a wooden spoon or spatula. As the dough starts to come together, gradually add the remaining liquid. You want the dough to be slightly sticky but manageable. If it feels too dry, add a teaspoon of water at a time until you achieve the desired consistency.
Kneading the Dough: How to Recognize When the Dough is Ready
Kneading is a crucial step that develops gluten in the dough, giving your bread structure and chewiness. Once your ingredients are combined into a rough dough, turn it out onto a lightly floured surface. Begin kneading by pushing the dough away from you with the heel of your hand, folding it back over itself, and repeating this motion.
Knead for about 8-10 minutes until the dough becomes smooth and elastic. You can test its readiness by performing the “windowpane test.” Take a small piece of dough and stretch it gently. If it stretches thin enough to let light through without tearing, it’s ready. If it tears easily, continue kneading for a few more minutes.
Shaping the Bread: Different Styles and Their Baking Implications
Once kneaded, it’s time to shape your dough. The way you shape your bread can influence its final texture and crust. For a round loaf, gently flatten the dough into a disc, then fold the edges into the center, creating a smooth top. Flip it over and roll it slightly to create tension on the surface.
For a more rustic look, you can also opt for a free-form shape by simply rounding it with your hands. Alternatively, if you prefer a more structured loaf, you can use a loaf pan or a round Dutch oven. Each shape will yield different crust and crumb characteristics, so don’t hesitate to experiment with various styles.
Preparing the Pan: Best Practices for Greasing and Using Parchment Paper
Proper preparation of your cooking vessel is crucial for preventing sticking and ensuring a clean release. If you’re using a non-stick pan, a light coat of oil may suffice. For more delicate loaves, such as those with cheese or seeds, consider using parchment paper. Cut a piece large enough to fit the bottom of the pan, allowing for some overhang so you can easily lift out the bread after cooking.
If you choose to grease the pan, use a neutral oil like vegetable or olive oil, coating the entire surface evenly. This will help facilitate the browning of the crust while keeping the bread from sticking.
Cooking the Bread: Monitoring Heat and Timing for Optimal Results
Cooking your stovetop artisan bread requires attention to heat and timing. Start by heating your pan over low to medium heat, allowing it to warm up gradually. This step is crucial, as too high of a heat can result in a burnt crust while leaving the inside undercooked.
Once the pan is ready, carefully place your shaped dough inside. Cover the pan with a lid to create an oven-like environment. This helps to trap steam, making your bread rise beautifully. Cooking time will vary depending on the thickness of your dough and the heat of your stove, but typically it will take about 30-40 minutes.
Every 10 minutes, check the bread. If it’s browning too fast, reduce the heat. You can also rotate the pan for even cooking.
Checking for Doneness: Techniques and Tools for Ensuring Perfect Bread
To ensure your bread is fully cooked, you’ll need to check for doneness properly. The simplest method is to tap the bottom of the loaf; it should sound hollow. If you have a kitchen thermometer, insert it into the center of the bread. The internal temperature should read around 190-200°F (88-93°C).
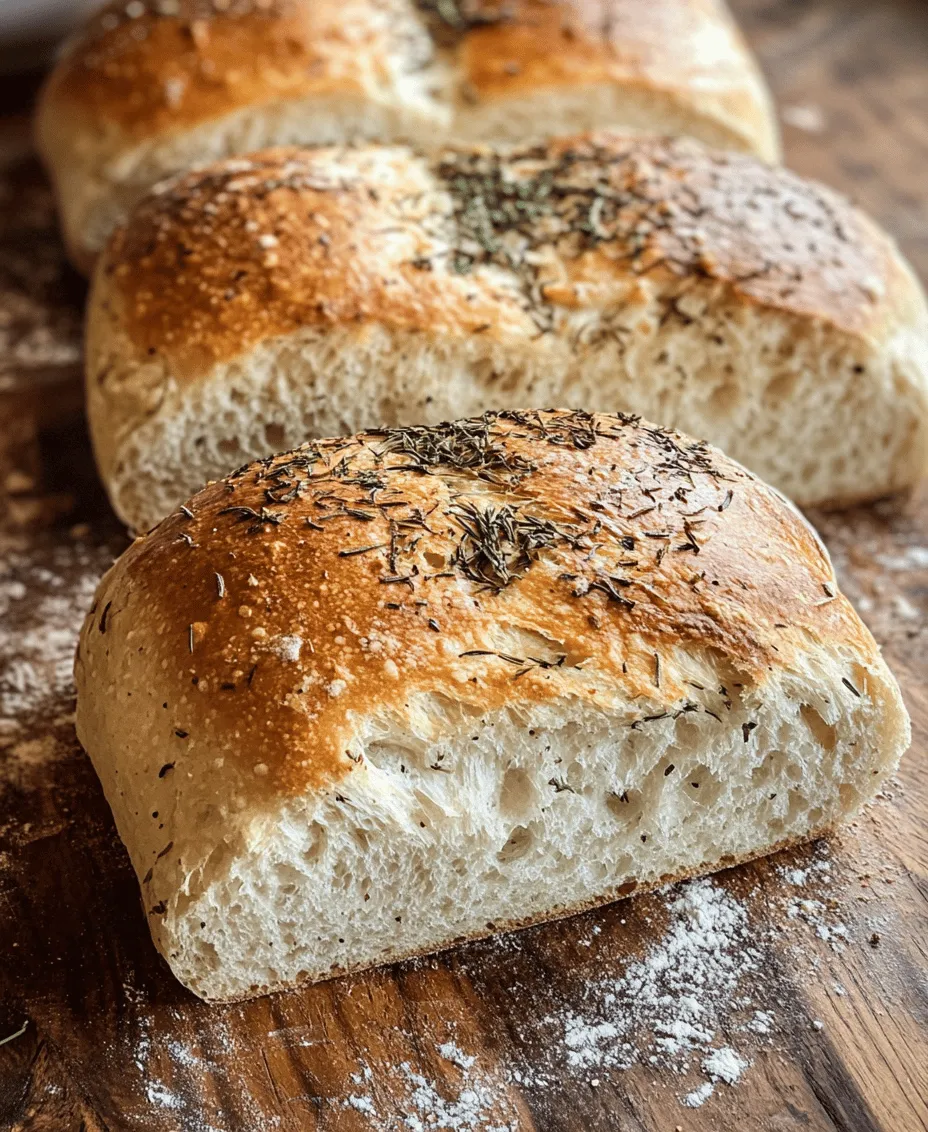
Another visual cue is the color of the crust. A golden-brown crust indicates that the sugars are caramelizing nicely. Once you are confident it’s cooked through, remove the bread from the pan and allow it to cool.
Cooling and Serving: Importance of Cooling for Texture and Taste
Cooling your bread is a crucial step that many often overlook. After removing the bread from the pan, place it on a wire rack if you have one. This allows air to circulate around the loaf, preventing the bottom from becoming soggy. Cooling for at least 20-30 minutes is recommended before slicing.
Serving your homemade bread can take many forms. Enjoy it warm with butter, use it for sandwiches, or slice it for toast in the morning. The possibilities are endless, and the satisfaction of serving fresh, homemade bread to friends and family is unparalleled.
Creative Variations and Flavor Enhancements
Once you master the basic recipe, the world of flavor and texture opens up. Here are a few creative variations to consider:
– Ingredient Substitutions: Instead of all-purpose flour, try whole wheat flour for a nuttier flavor or gluten-free alternatives if needed. Each type of flour offers distinct taste profiles and textures.
– Flour Types for Unique Flavors: Experiment with different flours such as rye, spelt, or oat flour. Each contributes unique flavors and nutritional benefits.
– Incorporating Seeds, Nuts, or Cheese: Add flavor and texture by mixing in seeds like sunflower or sesame seeds, nuts like walnuts or pecans, or even cheese such as feta or cheddar into the dough. This not only enhances taste but also adds nutritional value.
– Flavoring Options with Herbs or Spices: Consider folding in herbs like rosemary or thyme, or spices like garlic powder or smoked paprika for a gourmet twist.
Nutritional Benefits of Homemade Bread
Making bread at home offers numerous health benefits compared to store-bought options. Here are some key points:
– Control Over Ingredients and Allergens: When you bake at home, you have complete control over what goes into your bread. This is particularly important for those with allergies or dietary restrictions.
– Whole Grains and Fiber Content: By using whole grain flours, you increase the fiber content of your bread, which is beneficial for digestive health and can help maintain a feeling of fullness.
– Reducing Preservatives and Additives: Store-bought bread often contains preservatives and additives to prolong shelf life. Homemade bread allows you to avoid these ingredients, making it a healthier option.
Culinary Context and Cultural Significance
Bread is a staple food across various cultures, symbolizing sustenance and community. The act of bread-making has a rich history, dating back thousands of years. In many cultures, bread is associated with hospitality and sharing; it’s often the centerpiece of gatherings.
Recently, there has been a resurgence in homemade bread-making, driven by a desire for authenticity and the joy of crafting something from scratch. Baking bread at home has become a way to connect with family and friends, sharing experiences and flavors that are deeply rooted in tradition.
Conclusion
Making stovetop artisan bread is a rewarding and straightforward endeavor that requires minimal ingredients and equipment. The simplicity of the process combined with the delightful aroma of baking bread brings a sense of accomplishment that is hard to match.
As you venture into the world of bread-making, don’t hesitate to experiment with variations and share your creations with others. Each loaf tells a story, connecting you with culinary traditions and the joy of homemade goodness. Embrace the satisfaction of creating delicious bread without the need for an oven, and indulge in the experience of savoring something made with your own hands.