
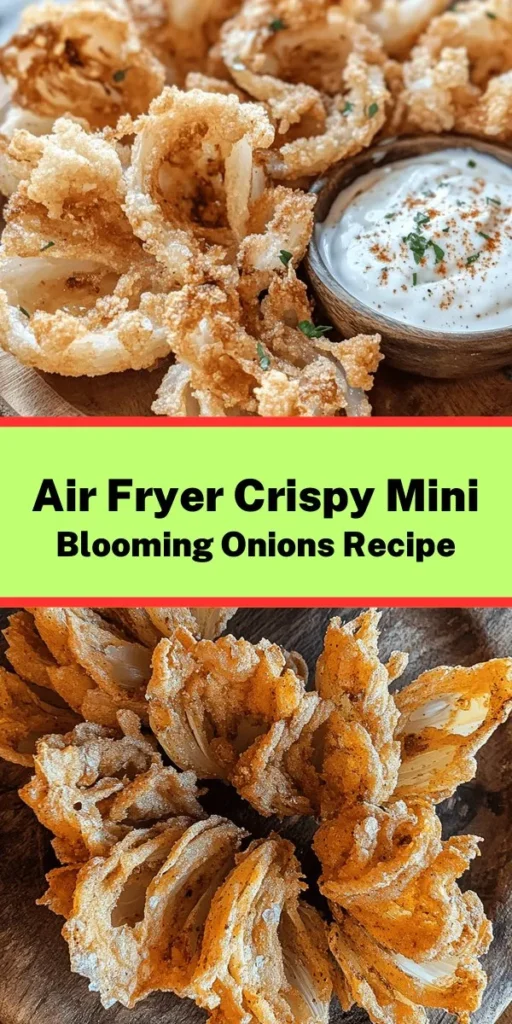
Introduction
Blooming onions have long captivated the hearts and taste buds of many as a delicious appetizer, often seen gracing the menus of popular restaurants and casual dining spots alike. This iconic dish features a whole onion that has been beautifully cut to resemble a flower, then fried to golden perfection, creating a crispy exterior that encases tender, flavorful onion layers. However, while traditional blooming onions are undeniably tasty, they are also laden with oil and calories. Enter the air fryer, a game-changer in the culinary world that allows us to enjoy our favorite fried foods with significantly less oil.
Air frying offers a healthier alternative to the traditional frying method, preserving the rich flavors of the ingredients while dramatically reducing the amount of oil used. With this method, we can achieve that coveted crunch and texture of a blooming onion without the guilt that often accompanies deep-fried foods. In this article, we will delve into a delightful recipe for crispy mini blooming onions prepared in an air fryer, showcasing how easy it is to whip up this crowd-pleasing appetizer at home. The mini size not only makes them a perfect finger food but also adds an extra crunchiness that will leave you and your guests wanting more.
This recipe is designed for anyone looking to indulge in a flavorful treat without compromising on health. The combination of simple ingredients and straightforward preparation steps makes this recipe accessible to cooks of all skill levels. With a little guidance, you can master the art of creating these delectable mini blooming onions that are sure to impress at any gathering.
Understanding the Ingredients
To create crispy mini blooming onions, it’s essential to understand the role of each ingredient in the recipe. The foundation of this dish lies in its simplicity and quality.
Onions
The type of onion you choose is critical to the success of this recipe. While larger onions are typically used for traditional blooming onions, we will focus on mini varieties for this recipe. Pearl onions and cipollini onions are ideal candidates for their sweet flavor profiles and tender textures. Pearl onions are small and round, while cipollini onions are flatter and slightly larger, both lending themselves well to the blooming effect. Their natural sweetness enhances the flavor of the dish, providing a delightful contrast to the crispy coating. When selecting your onions, look for firm, unblemished bulbs, which will yield the best results.
Buttermilk
Buttermilk plays a crucial role in this recipe, serving as both a tenderizer and an adhesive for the breading. The acidity in buttermilk breaks down the onion’s fibers, resulting in a softer, melt-in-your-mouth texture after cooking. Additionally, soaking the onions in buttermilk helps the breading adhere better, ensuring that each bite is packed with flavor and crunch. If you don’t have buttermilk on hand, you can easily make a substitute by mixing regular milk with a splash of vinegar or lemon juice, allowing it to sit for a few minutes until it thickens slightly.
Breading Components
The breading is what gives these mini blooming onions their irresistible crunch. A combination of flour, cornstarch, and an array of spices creates a flavorful coating that crisps up beautifully in the air fryer.
– Flour: All-purpose flour is the primary ingredient in the breading, providing structure and a base for the other components. It helps form a solid crust around the onion when cooked.
– Cornstarch: Adding cornstarch to the breading mixture enhances the crispiness of the coating. Cornstarch absorbs moisture and creates an ultra-crunchy texture, making it an essential ingredient for achieving that perfect crunch.
– Spices: A blend of spices such as paprika, garlic powder, onion powder, and cayenne pepper adds depth and flavor to the breading. Adjust the spice levels according to your taste preferences, and feel free to experiment with different seasonings to create a unique twist on this classic recipe.
Cooking Spray
Using cooking spray is essential for achieving the desired crispiness without the excess oil that comes from traditional frying methods. A light coating of cooking spray helps the breading develop a golden-brown color and a satisfying crunch, while still keeping the dish on the healthier side. Look for a high-quality cooking spray that is free from propellants and additives for the best results.
Preparation Steps Explained
Now that we have a clear understanding of our ingredients, let’s dive into the preparation steps that will lead us to perfectly crispy mini blooming onions.
Preparing the Onions
The first step in making our mini blooming onions is preparing the onions themselves. This process will set the stage for achieving that beautiful blooming effect.
1. Peeling the Onions: Start by peeling the outer layers of the onions. Take care to remove only the papery skin, as you want to keep the onion intact. Use a sharp paring knife for precision, ensuring that you don’t cut too deeply into the onion itself.
2. Trimming the Onions: Once peeled, trim off the root end of each onion, making sure to leave the stem intact. This will help hold the onion together during the cooking process. Be cautious while handling the knife, ensuring that you maintain control throughout the trimming.
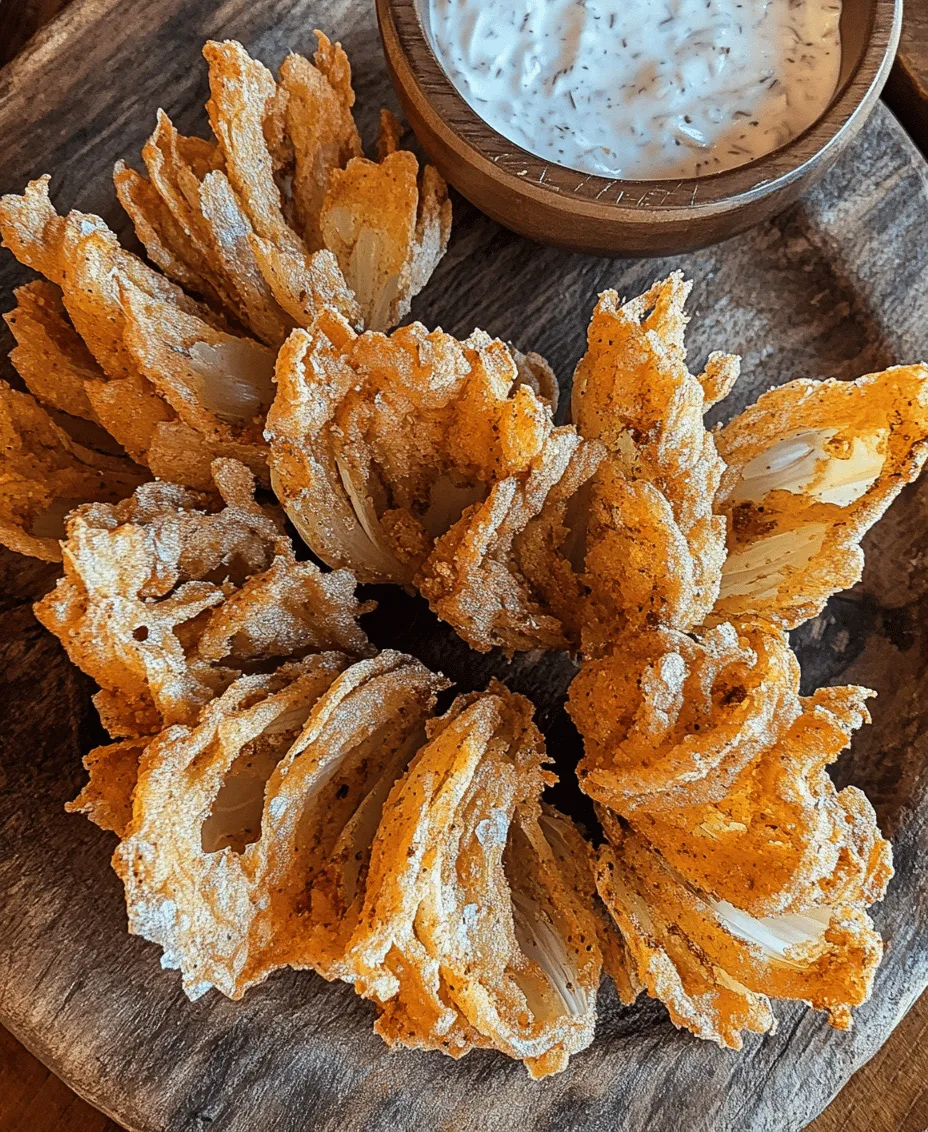
3. Making Precise Cuts: The key to achieving the blooming effect lies in how you cut the onion. Place the onion on a cutting board, root side down, and make vertical cuts from the top down toward the root, being careful not to cut all the way through. Aim for about 8-12 evenly spaced cuts, depending on the size of the onion. As you make these cuts, you will start to see the onion “bloom” open. Repeat this process for each onion, taking your time to ensure uniformity.
Soaking in Buttermilk
Once your onions are prepared, it’s time to soak them in buttermilk. This step is essential for enhancing flavor and texture.
1. Soaking Process: Place the prepared onions in a bowl and pour enough buttermilk over them to cover the onions completely. Allow them to soak for at least 30 minutes, although soaking for up to 2 hours can yield even better results. The longer the onions soak, the more tender they become, and the better the breading will adhere during cooking.
2. Impact of Soaking: During this soaking period, the buttermilk will infuse the onions with flavor while also starting to tenderize them. This step is crucial for achieving the melt-in-your-mouth texture that makes blooming onions so enjoyable.
Creating the Breading Mixture
While the onions soak, you can prepare the breading mixture that will provide the crunchy coating.
1. Mixing Dry Ingredients: In a large mixing bowl, combine all-purpose flour, cornstarch, and your chosen spices. Start with a base of about 1 cup of flour and 1/2 cup of cornstarch, adjusting these amounts based on the number of onions you are preparing. Add in spices like paprika (1 teaspoon), garlic powder (1 teaspoon), onion powder (1 teaspoon), and cayenne pepper (optional, for a kick). Whisk the dry ingredients together until they are evenly incorporated.
2. Adjusting for Flavor: Taste your breading mixture and adjust the seasoning as needed. If you prefer a spicier coating, feel free to add more cayenne or even some chili powder. For a more herby flavor, consider adding dried oregano or thyme to the mix.
Coating the Onions
Now that your onions have soaked and your breading mixture is ready, it’s time to coat the onions.
1. Dredging the Onions: Remove the soaked onions from the buttermilk, allowing excess liquid to drip off. Dip each onion into the breading mixture, making sure to coat it evenly. Gently press the breading onto the surface of the onions to ensure it adheres well. Repeat this process until all the onions are coated.
2. Spraying with Cooking Spray: Once coated, lightly spray each onion with cooking spray. This step is vital for achieving that crispy finish in the air fryer, as it helps the breading brown beautifully without the need for excessive oil.
This initial part of our journey to creating crispy mini blooming onions in the air fryer has covered the foundational concepts behind the recipe. Understanding the ingredients and the preparation steps is crucial for ensuring success in the kitchen. With these steps in place, you’re well on your way to delighting your family and friends with this delectable appetizer. Stay tuned as we continue with the cooking process, which will bring these mini blooming onions to life in the air fryer, showcasing their golden, crunchy exterior and tender interior.
Dredging Technique for Even Coating
To achieve the perfect balance of crunchy and flavorful crispy mini blooming onions, mastering the dredging technique is essential. Begin by preparing your dredging station, which includes three separate bowls: one for the flour mixture, another for the egg wash, and a third for the breadcrumb coating.
1. Flour Mixture: In the first bowl, combine all-purpose flour with your choice of spices—paprika, garlic powder, onion powder, and a pinch of salt and pepper. This mixture not only provides a base flavor but also helps the egg wash adhere better to the onion.
2. Egg Wash: In the second bowl, beat a couple of eggs with a splash of milk or water to create a smooth egg wash. This step adds moisture, which is crucial for the breadcrumbs to stick.
3. Breadcrumb Coating: The final bowl should contain your choice of breadcrumbs—panko breadcrumbs work best for an extra crunch. For an added twist, consider mixing in some grated Parmesan cheese or seasoning the breadcrumbs with additional spices.
Dredging Steps:
– Take one mini onion and dip it into the flour mixture, ensuring it’s evenly coated. Shake off any excess flour to avoid clumping.
– Next, immerse the floured onion into the egg wash, allowing it to soak briefly for better adhesion.
– Finally, roll the onion in the breadcrumb mixture, pressing gently to ensure a thorough coating. This multi-layered process guarantees that every bite is bursting with flavor and crunch.
Tips for Avoiding Excess Flour:
To maintain the crispiness of your mini blooming onions, it is crucial to avoid excess flour. Here are some tips:
– Tap it Off: After coating in flour, gently tap the onion against the edge of the bowl to remove any clumps.
– Use a Sifter: If your flour is clumpy, sift it before using to ensure an even coating.
– Batch Dredging: If you are working with multiple onions, dredge them in batches rather than all at once. This prevents them from becoming soggy and helps maintain individual textures.
Air Frying Process
Preheating the Air Fryer:
Before cooking, preheating your air fryer is a vital step that should not be overlooked. Set your air fryer to 375°F (190°C) and let it run for about 3-5 minutes. Preheating ensures that the air fryer reaches the desired temperature, promoting even cooking and allowing the onions to crisp up beautifully. A properly preheated air fryer creates a hot environment that circulates air efficiently, resulting in perfectly cooked mini blooming onions.
Arranging the Onions in the Air Fryer:
Proper arrangement in the air fryer basket is crucial for achieving that golden-brown, crispy texture. Here are best practices for arranging the onions:
– Single Layer: Place the coated mini onions in a single layer in the air fryer basket. Avoid overcrowding, as this restricts air circulation and can lead to uneven cooking.
– Space Them Out: Leave some space between each onion to allow hot air to circulate freely around them. This space is essential for even crispiness.
– Batch Cooking: If you have a lot of onions, consider cooking them in batches. It may take a little longer, but the results will be worth it.
Cooking Time and Temperature:
For optimal results, cook your crispy mini blooming onions at 375°F (190°C) for approximately 10-12 minutes. However, cooking times can vary based on the size of the onions and your specific air fryer model. Here are some tips for ensuring doneness:
– Check Halfway: At the halfway point of cooking, pause the air fryer and gently shake the basket to redistribute the onions. This ensures even browning on all sides.
– Visual Cues: Look for a golden-brown color and a crispy exterior as signs of doneness. If they seem pale or soft, continue cooking for an additional 2-3 minutes, checking frequently to prevent overcooking.
– Internal Temperature: If you want to be precise, you can use an instant-read thermometer to check the internal temperature. Aim for around 165°F (74°C) to ensure they are cooked through.
Serving Suggestions
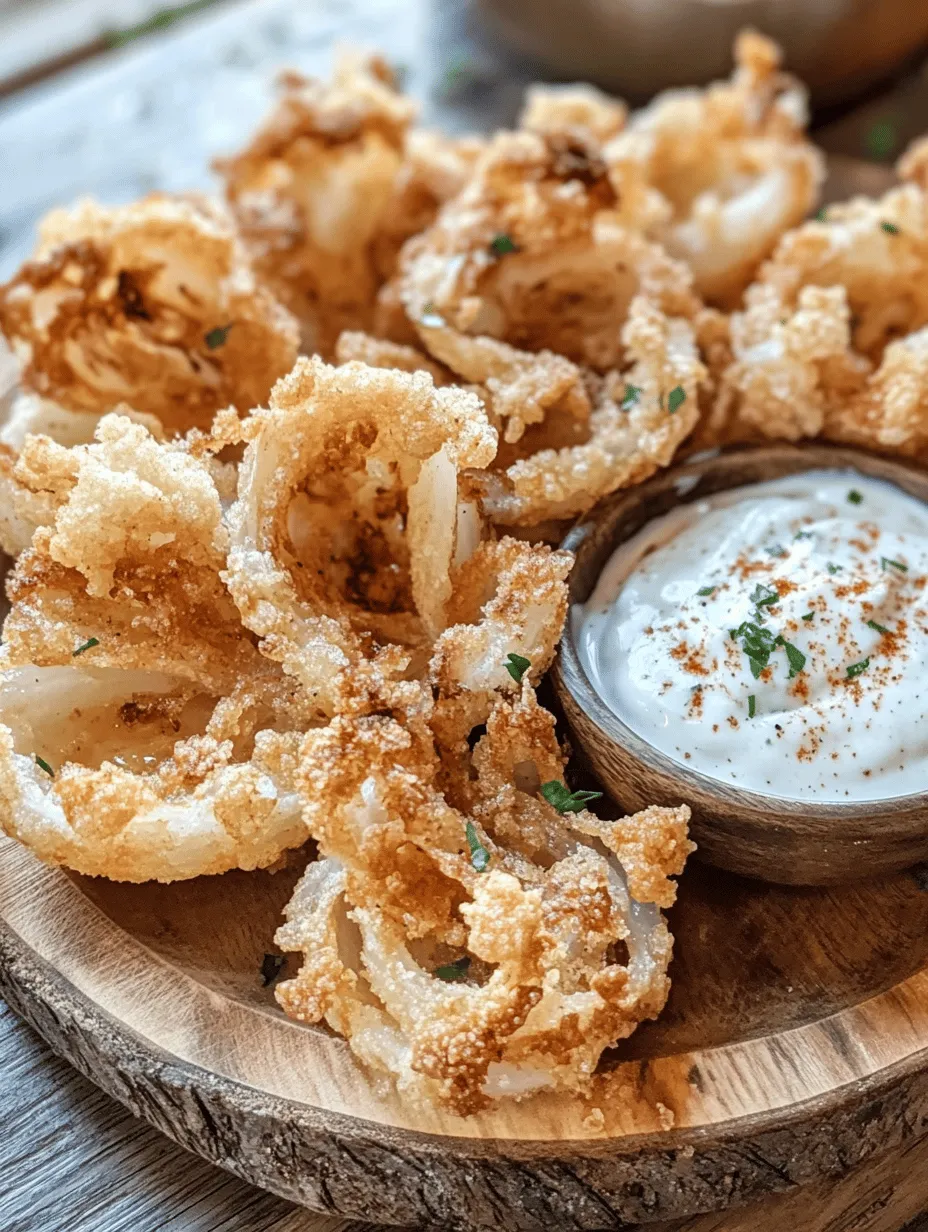
Once your crispy mini blooming onions are ready, it’s time to serve them up in style. Here are some ideal dipping sauces and presentation ideas to elevate your dish:
Dipping Sauces:
– Ranch Dressing: A classic choice that pairs perfectly with the flavors of blooming onions. The creamy texture balances the crunchiness.
– Spicy Mayo: Combine mayonnaise with sriracha or your favorite hot sauce for a zesty kick. This sauce adds a creamy yet spicy element that complements the onions beautifully.
– Honey Mustard: Mix equal parts honey and Dijon mustard for a sweet and tangy dip that enhances the flavors of the fried onions.
Presentation Ideas:
– Plating: Arrange the mini blooming onions on a large serving platter, garnished with fresh parsley or chives for a pop of color.
– Serving in a Cone: For a fun twist, serve the onions in a paper cone or small basket lined with parchment paper. This not only looks appealing but also makes them easy to grab and enjoy.
– Accompaniment: Consider serving with a side of fresh veggie sticks or chips to add variety and color to your platter.
Occasions for Serving:
Crispy mini blooming onions are versatile and perfect for various occasions. They make an excellent appetizer for:
– Parties: Impress your guests with this fun and shareable dish.
– Game Day: Serve them as a crowd-pleasing snack during sporting events.
– Movie Nights: Pair them with your favorite films for a tasty treat.
Nutritional Information and Health Benefits
Understanding the nutritional content of your crispy mini blooming onions can help you enjoy them mindfully. Here’s an overview:
Nutritional Content (per serving of four mini blooming onions):
– Calories: Approximately 200
– Protein: 4g
– Carbohydrates: 30g
– Fat: 8g
– Fiber: 3g
Health Benefits:
Air-frying significantly reduces the amount of oil used compared to traditional frying methods, making these mini blooming onions a healthier alternative. Here’s how they compare:
– Lower Calorie Count: Air-fried versions typically contain fewer calories and less fat, allowing you to enjoy your favorite snack without the guilt.
– Retained Nutrients: The air frying process helps retain more vitamins and minerals in the onions compared to deep-frying, promoting healthier eating.
Portion Control and Serving Sizes:
It’s easy to indulge in crispy mini blooming onions, so consider portion control. Serving sizes of about four onions can satisfy cravings without overindulging. Pair them with a salad or vegetable side to create a balanced meal.
Conclusion
Crispy mini blooming onions made in the air fryer are not only a delightful and flavorful appetizer but also a healthier alternative to traditional frying methods. With their satisfying crunch and versatility in serving, they can easily become a favorite dish for any gathering.
Encouraging experimentation, don’t hesitate to try different spices in your batter or explore a variety of dipping sauces to customize your experience. The joy of creating these crispy, flavorful appetizers lies in the endless possibilities for flavor combinations and presentations. Whether it’s a casual weeknight dinner or a festive celebration, crispy mini blooming onions are sure to impress and satisfy. Enjoy the process of making them as much as you enjoy eating them!
